Red Escallonia is an evergreen hedge with glossy, dark-green leaves,̴Ì?complemented with bunches of stunning pink-red flowers from June̴Ì?- October.
About Red Escallonia Hedging
Being a popular shrub amongst gardeners, the Escallonia rubra ‰ۡÌÝÌáMacrantha,‰ۡó» showcases vibrant colours and a distinct appearance. The plant produces masses of bell-shaped flowers, which can look amazing in any garden, and the evergreen attribute to the hedge provides you with stunning year-round interest in your space.
Please note- although Escallonia is initially classified as evergreen, some will lose a few leaves during very harsh winters.
The flowers are likely to last until the first frosts start coming in, making it popular for attracting bees, and is more than likely to brighten up your garden.
It is also averagely fast growing, sitting at a growth rate of 30/45cm per annum.
Key Features
The Escallonia Red can withstand most soils and situations- it is particularly tolerant of coastal situations, however, and will not do well in shady or (very) cold positions.
-
Growth height: Average: (20-40cm per year)
-
Ideal height: 2.5m+ Tall
-
Soil Type: Normal
-
Exposure: Coastal, Exposed, Inland
-
Aspect: Semi-shade, Sun
-
Evergreen foliage? Yes
Pruning & Care
General trimming of your Escallonia Red should always be done straight after the flowers have faded. We also recommend giving the plant a harder prune in early spring, about April/May time, as this will help the plant to grow back and thrive nicely.
How To Plant Red Escallonia
When should I plant Red Escallonia hedging?
The best time to plant Red Escallonia is during autumn, when the weather has cooled down a little.
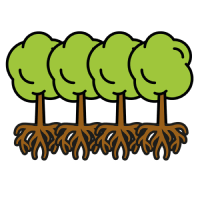
How far apart do you plant Escallonia?
The plant will develop and establish best when spaced around 30-40cm apart. This will provide a dense coverage and healthy, strong roots.
How to plant Red Escallonia:
Begin by digging a hole that is 2-3 times wider than the plant's root ball, but the same depth. Break up the excavated soil and mix in some soil mix, compost, or organic soil conditioner. Pour a thick layer of this at the bottom of the hole, and fork through a little.
Remove the plant from its pot and thread a cultivator along the clumped roots to disentangle them. Then, position the plant in the centre of the hole and spread out its roots. Add a stake if required.
Backfill with what is left of the soil, and press down lightly but firmly to secure the plant. Water abundantly, and continue to water regularly throughout the first year after planting.̴Ì?
Finally, place 2-3" mulch at the base of the plants to retain soil moisture and warmth throughout the seasons.
̴Ì?